This Easter break, I had big plans. I was going to clean and organize the whole house, especially the younger two girls' room. The house has needed a deep cleaning/organizing/decluttering for a while now, and having a week with nothing else on the schedule seemed like the perfect time to do it.
But then my girls asked if we could do some crafting together. A couple of months ago, we'd delved into the world of doll repainting, and it had been a long time since we'd had a chance to do it.
So instead of spending the week cleaning, I spent the week in my pjs, sitting around the table with my girls, repainting dolls and listening to radio dramas.
It was totally worth it.
I know when I'm eighty I won't look back on this week and wish I'd dusted and organized. ;) It was so much fun spending this precious time with the girls, feeding their creativity and sharing our crafting passion together.

This was what our table looked like for most of the week.

And this. ;)
So, you've probably gathered this from the above pictures, but this post will be chock full of naked dolls and disembodied doll heads, so if you're weirded out or offended by either, this might be a good post to skip. ;)
I'd also like to apologize in advance for the wonky lighting on some of these photos. My phone camera lighting was a bit off, and basically, I was too lazy to go in and fix every single picture. :}
We each worked on several dolls over the course of our vacation, focusing mainly on Monster High and Ever After High dolls. Among our products used were soft pastels, watercolor pencils, acrylic paints, mod podge, hot glue, and Mr. Super Clear.
Gazelle from Zootopia

Little Gal decided she wanted to make a custom Gazelle from Zootopia. She studied online photos, and came up with her own design (shown on the left), which consisted of a repainted Barbie head with new hair and Sculpey horns, ears, and muzzle.

She made Gazelle's outfit from sparkly, pink felt. Gazelle's body was made from an Ever After High Ashlynn Ella doll from Goodwill with missing hands.

Little Gal made her special hands and a microphone from Sculpey, painted some custom boots, and then she was finished!


A closer look at her outfit.

Gazelle's shoes were some pink Monster High shoes that Little Gal painted with white accents.

Gazelle's microphone...

...and custom hands.
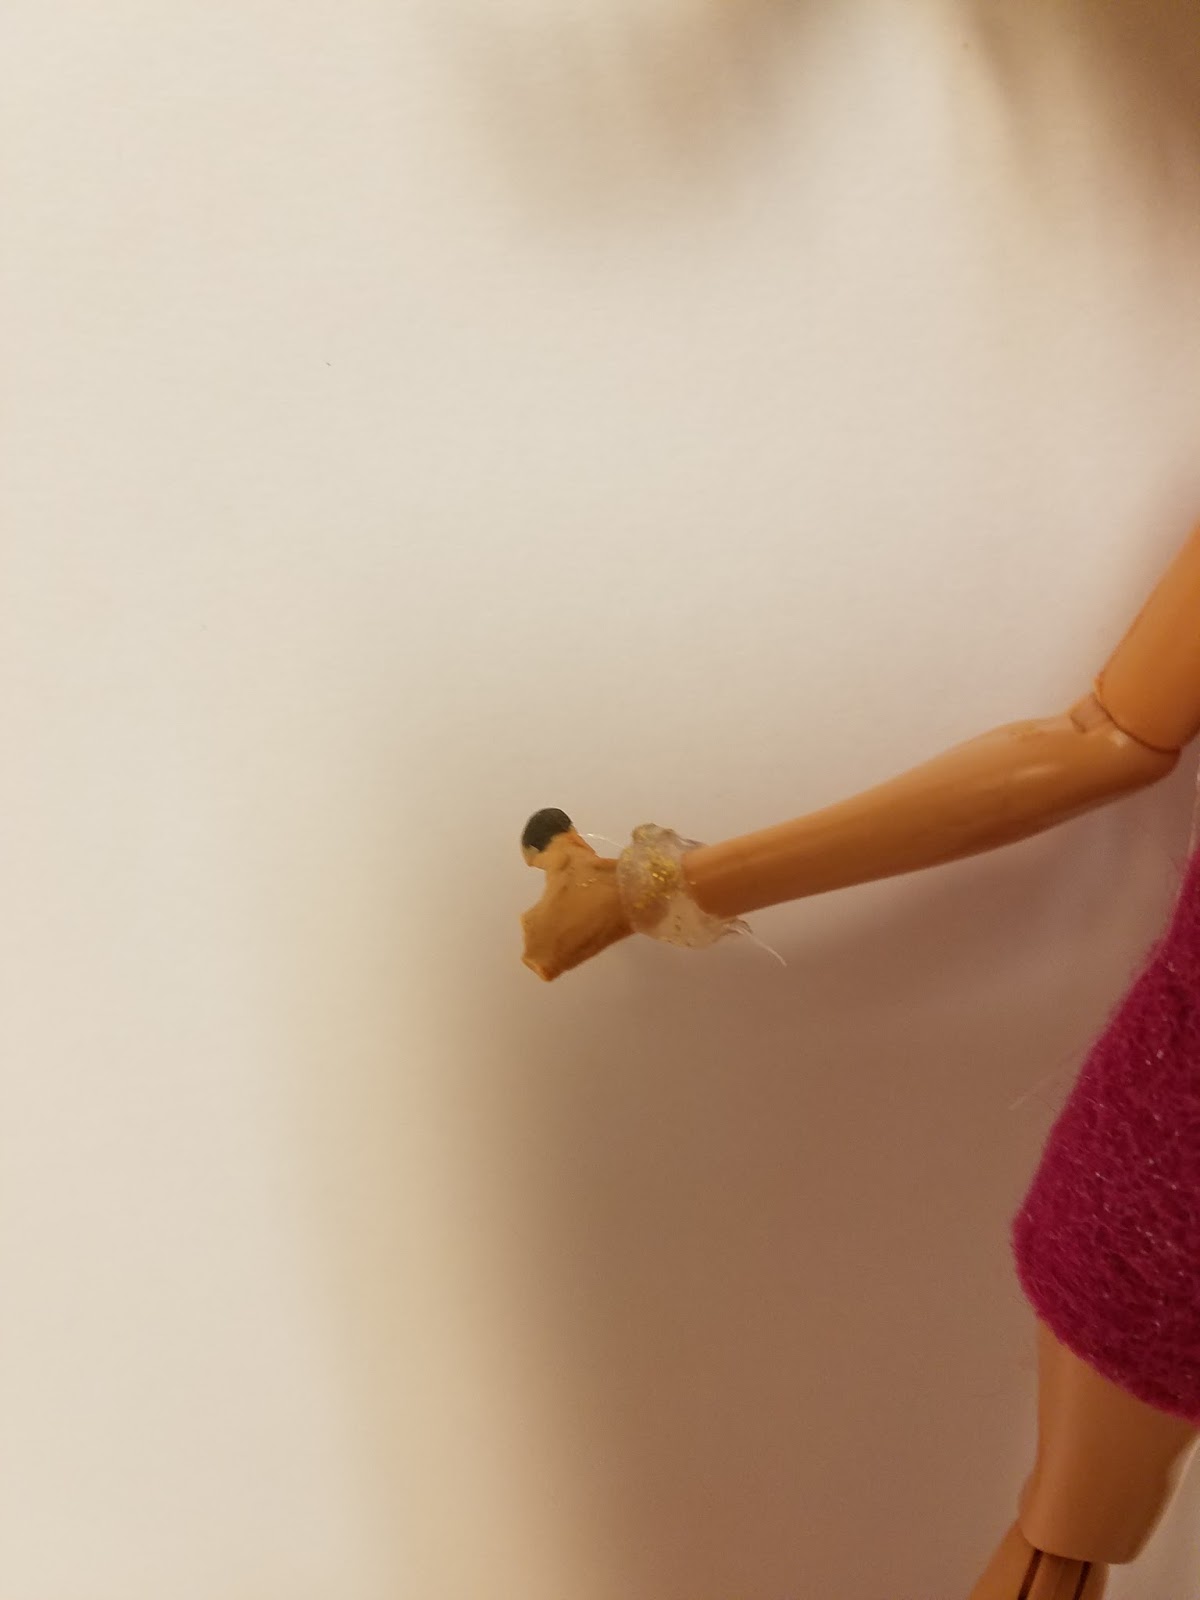
Unfortunately, she lost the fingers on her left hand. Hopefully Little Gal can make her a new hand soon.


I was really proud of Little Gal throughout this entire process. As the youngest and a perfectionist, she often struggles with bringing her ideas to reality. She either can't figure out a way to interpret her concept in real life, or she's unhappy with the results and gives up before she finishes. But this time, she kept working at it, even when she had a few setbacks. I'm very proud of her for figuring this out all by herself (and for asking Middle Gal for some hot gluing help when she needed it). Considering the fact that she's nine years old and this is the first time she's ever done something this ambitious, I think it's pretty spectacular. I loved the way she figured out how to make Gazelle's face, horns, and hands.
OOAK Monster High Clawdeen

One of Middle Gal's major projects this week was repainting this Monster High Clawdeen doll. Middle Gal removed the paint, I sealed her with Mr. Super Clear, and then Middle Gal got to work.

She started with soft pastels and watercolor pencils...

...and finished up with paint for some final touches. I love how sweet and innocent she looks now.
Unfortunately, I got a little too close with the Mr. Super Clear on one of Clawdeen's later coats, and since I accidentally ordered the glossy MSC instead of flat, her face ended up really shiny. :( Middle Gal was really nice about it, but I still felt bad. One of my dolls ended up with this extra glossy look too, so at least she wasn't the only one with a shiny-faced doll.

Here's Clawdeen's final look. Her new name is Calico, or "Callie" for short. Middle Gal decided to make her a cat warrior.


She made Callie this shield out of cardboard, mod podge, acrylic paint, and acrylic gems. Middle Gal took inspiration from the "armor of God" passage in Ephesians 6, which is why the shield has a cross on it. :)

She made arm straps on the back out of yarn.

Here's a look at her full outfit.

Callie's shirt is made from an old (clean) sock, and her skirt is made from brown felt. Her belt is made of some brown, braided imitation leather we picked up at Walmart.

Callie's ensemble includes a sword, made from a wooden skewer, hot glue, and acrylic paint.

Middle Gal also made a sheath out of denim fabric (from a pair of my old pants). ;) She glued it to the dress and then glued the belt over it.
As you can see, the sheath really works:


I have to say, Middle Gal blew me away with this custom. It was so much fun to see her creativity unleashed. Not only did she come up with the design for Callie's face and outfit, but she had a whole backstory figured out for her, too. :)
OOAK Monster High Howleen

Little Gal loved Middle Gal's Callie doll, and since we had a Howleen doll on hand, she decided to make a cat warrior little sister for Callie. This poor doll, another thrift store rescue, had a big pen mark across her forehead that I couldn't remove. Little Gal decided to use it as a battle scar. ;) This is her initial paint job. After this picture, she added some gold paint to her eyes to make them more cat-like.

Little Gal really went all out with her design, too. :) She decided to name her warrior cat Jemima, after the little cat who sings with Grizebella in Cats. [Side note: my kiddos haven't seen all of Cats, but we watched a few song highlights. My youngest would be too scared of some of the parts, and some of them are, in my opinion, a bit inappropriate.]

She designed a hood out of black felt, explaining that since Jemima is a warrior, she needs something to cover her bright pink hair when she's in battle so she doesn't give herself away. ;)

Jemima's shirt is made from white felt, and her pants are made from black felt.

Little Gal also made a shield out of cardboard, mod podge, and acrylic paint. She used hot glue to make the "leaping cat" on the front of the shield. Like Middle Gal, she used yarn at the back of the shield for Jemima's arm.
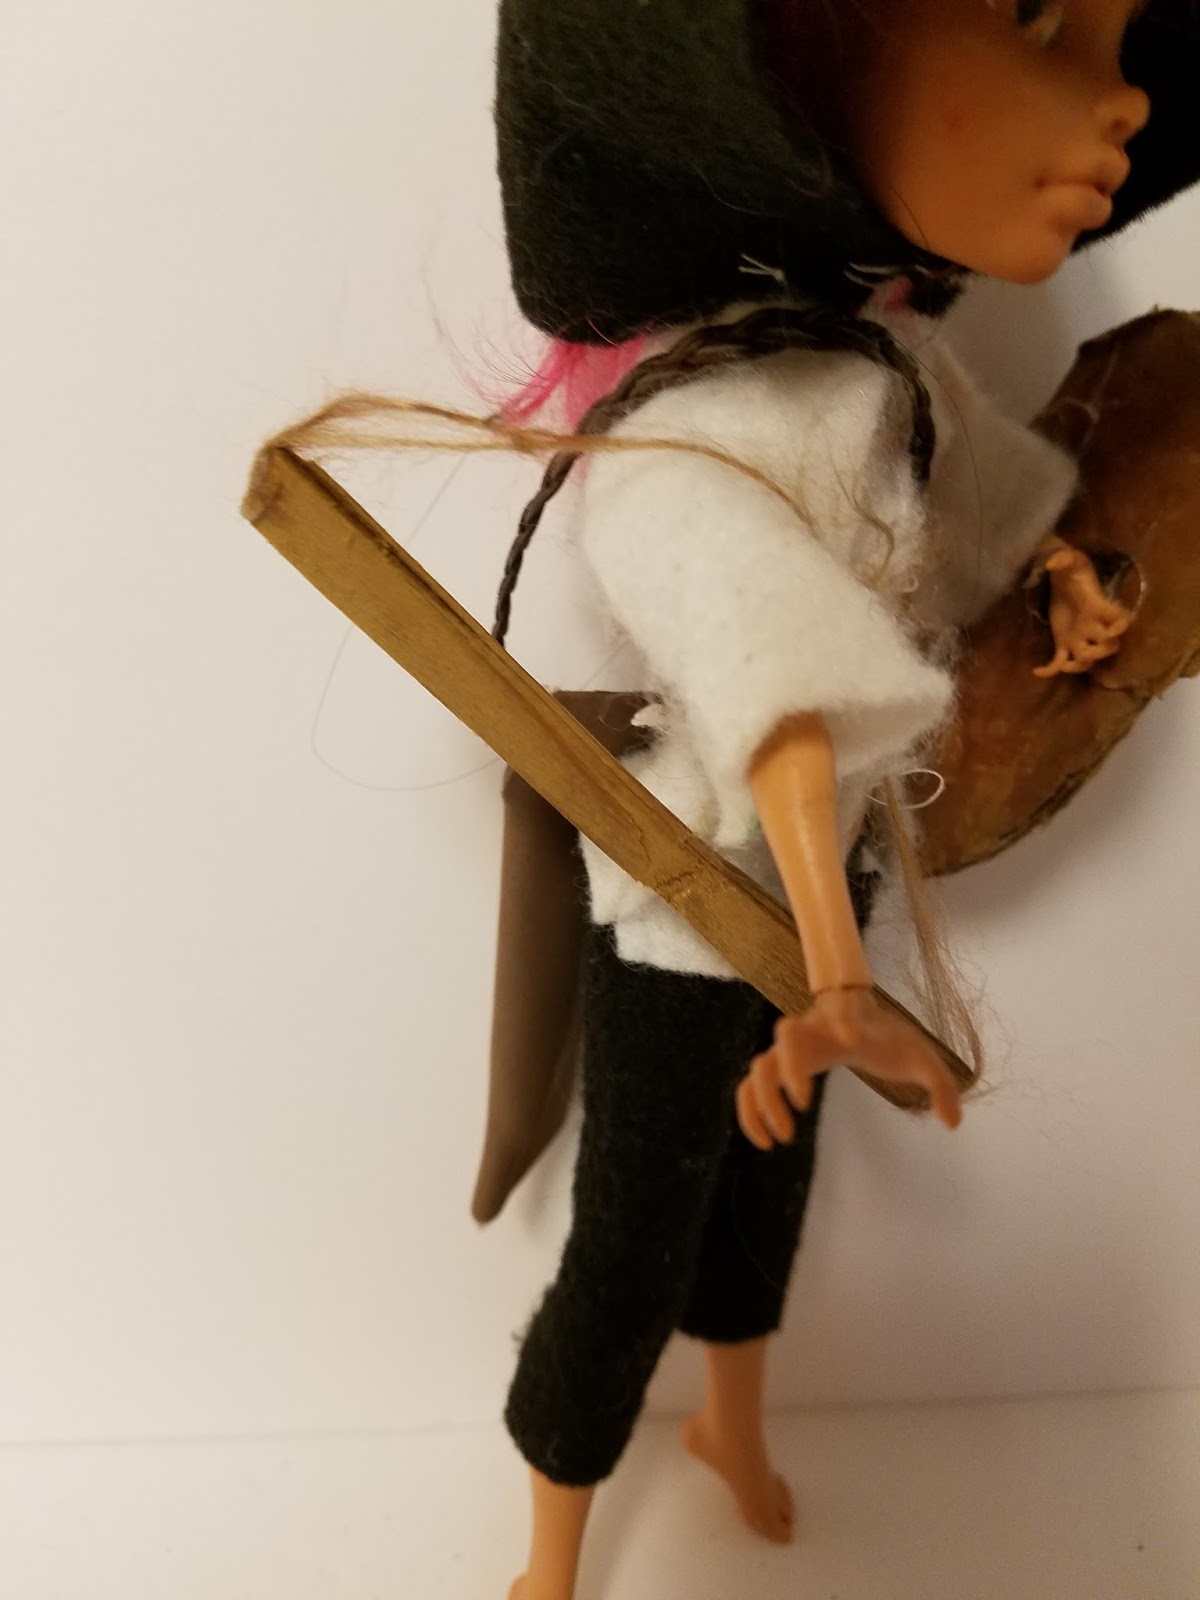
She also made Jemima a bow...

...and a quiver full of arrows. The bow was made from string and wood, and the quiver was made from craft foam and more of the braided imitation leather. She drew the design with Sharpie.

The arrows were some charms we found at Walmart.

Ready for battle.
I loved seeing Little Gal's work on this doll, too. While she definitely drew inspiration from her older sister, she had some great, original ideas of her own to add to her character.

Jemima and Callie, ready for battle. ;) Oldest Gal hopes to find a Monster High Clawdia Wolf at some point to make the warrior cat sisters a trio. :)
Various Unfinished Projects
You may be expecting Oldest Gal's project to come next, but unfortunately, she wasn't able to finish any of hers this week. She had a few more activities throughout the week, and she's also very methodical in her process. She still had a great time creating with us, though. :)

One of the things she decided to try was rerooting one of her dolls with yarn.
She got a lot done:


The other girls tried it, too:

Little Gal's doll...

...and Middle Gal's doll.

With her nifty night sky cheek art. ;)
It's funny, there was one night where the three of them spent the entire evening rerooting while I worked on my projects and we listened to Cabin Pressure. They all talked about how fun it was and how they couldn't wait to finish.
By the next day, they were all much less enamored with the process, especially since their thumbs were sore from poking the needle through the doll heads for several hours. And as anyone who has done rerooting knows, it's a LONG process. (Why do you think I skipped out on the rerooting party?) ;) So hopefully, their dolls will eventually have full heads of hair. But for now, I think everyone got a little burned out on the "fun" of rerooting.

Oldest Gal also did a lot of layering work on her head that will eventually be a mermaid.

Here are the two heads she worked on.

Middle Gal wanted to make a mermaid doll, too. This was her first version, but she wasn't very happy with it.

Around this time, I was working on a mermaid doll of my own, so Middle Gal decided to redo hers. She took inspiration from one of my methods and then expanded it and made it her own.

Here's the new version.

She used wire armature for the base of the tail, then wrapped it in lace and painted over it.

She used sandwich bag plastic for the fins, covered in paint and glitter.

She also used gems, paint, and pastels for extra accents.

Back view.

This was originally going to be the mermaid's head, but she added so many layers of soft pastel on the face that it changed the skin tone to a very different shade than the body. Because of this, Middle Gal decided to wait and find another Draculaura head for her mermaid body. Sadly, Goodwill has been rather low on Monster High dolls lately, so her mermaid might have to wait on that head for a while. ;)
Middle Gal's OOAK Ever After High Centaurette

This wasn't a project from this week, but I had to share Middle Gal's custom Ever After High centaurette she made a few weeks ago. She was inspired by THIS My Froggy Stuff tutorial. :)
Disney Store Belle Doll Repaint
Okay, now on to my projects from the week. I thought I'd start with the one I'm the least pleased with. As you guys know, I purchased a Disney Store live action Belle doll even though I wasn't 100% thrilled with her face paint job.

Belle before
I debated whether or not to try to repaint her for several weeks. Then, when I did decided to open her, I thought I'd start with simply removing her freckles and trying to get rid of some of her face shine. But when I accidentally took off part of her eyebrow as well, I decided I might as well dive in and do a complete face repaint.
Belle with her face paint removed:


I have to say, this was the most stressful of the projects I tackled over our repaint week. I knew I was no Noel Cruz, but I just hoped I'd end up with a doll that wasn't too ugly and somewhat resembled Emma Watson. :}

I started out trying to use watercolor pencils, but quickly discovered I couldn't get the pencils sharp enough to fit into those tiny eye grooves.

Another colored pencil attempt.

I finally gave up and went for paint instead.


Not as horrible as it could be. ;)

Her eyes really came to life when I added the highlights.

Here's the picture I used for reference. Unfortunately, as you can see in this picture, this was the other doll that was the victim of a too-close layer of glossy Mr. Super Clear. :( But more on that later.

After her faceup was done, it was time to restyle her hair. Like many other collectors, I was disappointed in the high forehead and severely pulled-back bangs the Disney Store chose for this doll, so my hope was to try to create a softer, more movie-accurate look. As I mentioned in a previous post, I started with boiling her hair to relax some of the curls. I kept her hair in the various sections I needed to recreate her hairstyle.


The original style had a thick, braided bun at the top of her head. Unfortunately, I had to take this down to soften her hairline, but getting that unruly, frizzy mess of hair back into neat braids that would cooperate into another braided bun was a lot easier said than done.

After two braids didn't work, I tried separating it into three...

...as you see here. But even that was too much hair.

I finally ended up chopping off the center braid and wrapping the other two braids around it in a bun. Obviously, this isn't the recommended method for this sort of style, especially if the doll is going to be a play doll, but since mine will be on display only, I figured it would work for this time. ;)

As you can see, her style already looks a lot softer.

Now I just had to get those two front sections of hair into the bun, and get the golden decoration around it.

It took several tries, some miniature bobby pins, and several sewing pins, but I finally succeeded.

Not perfect, but not terrible. ;)

And not too bad from the front.

I decided to rebody her with a Barbie Made to Move body so she'd have more posability.

And here she is, all together!

So, as I said, I'm not fully thrilled with the end result here. I'm really bummed about how shiny her face turned out. To make things worse, in trying to cover this up, I added a lot more pastel than I should have to try and give a more matte appearance to her face. It didn't help all that much, and made her face several shades darker than her body. I will probably eventually add pastel highlights to her body to help with the contrast.
And who knows? I may even try completely redoing her face paint at some point in the future. This time, I'll have a better idea of what not to do. And maybe someday I'll just be rich enough to hire Noel Cruz to do it for me instead. ;)
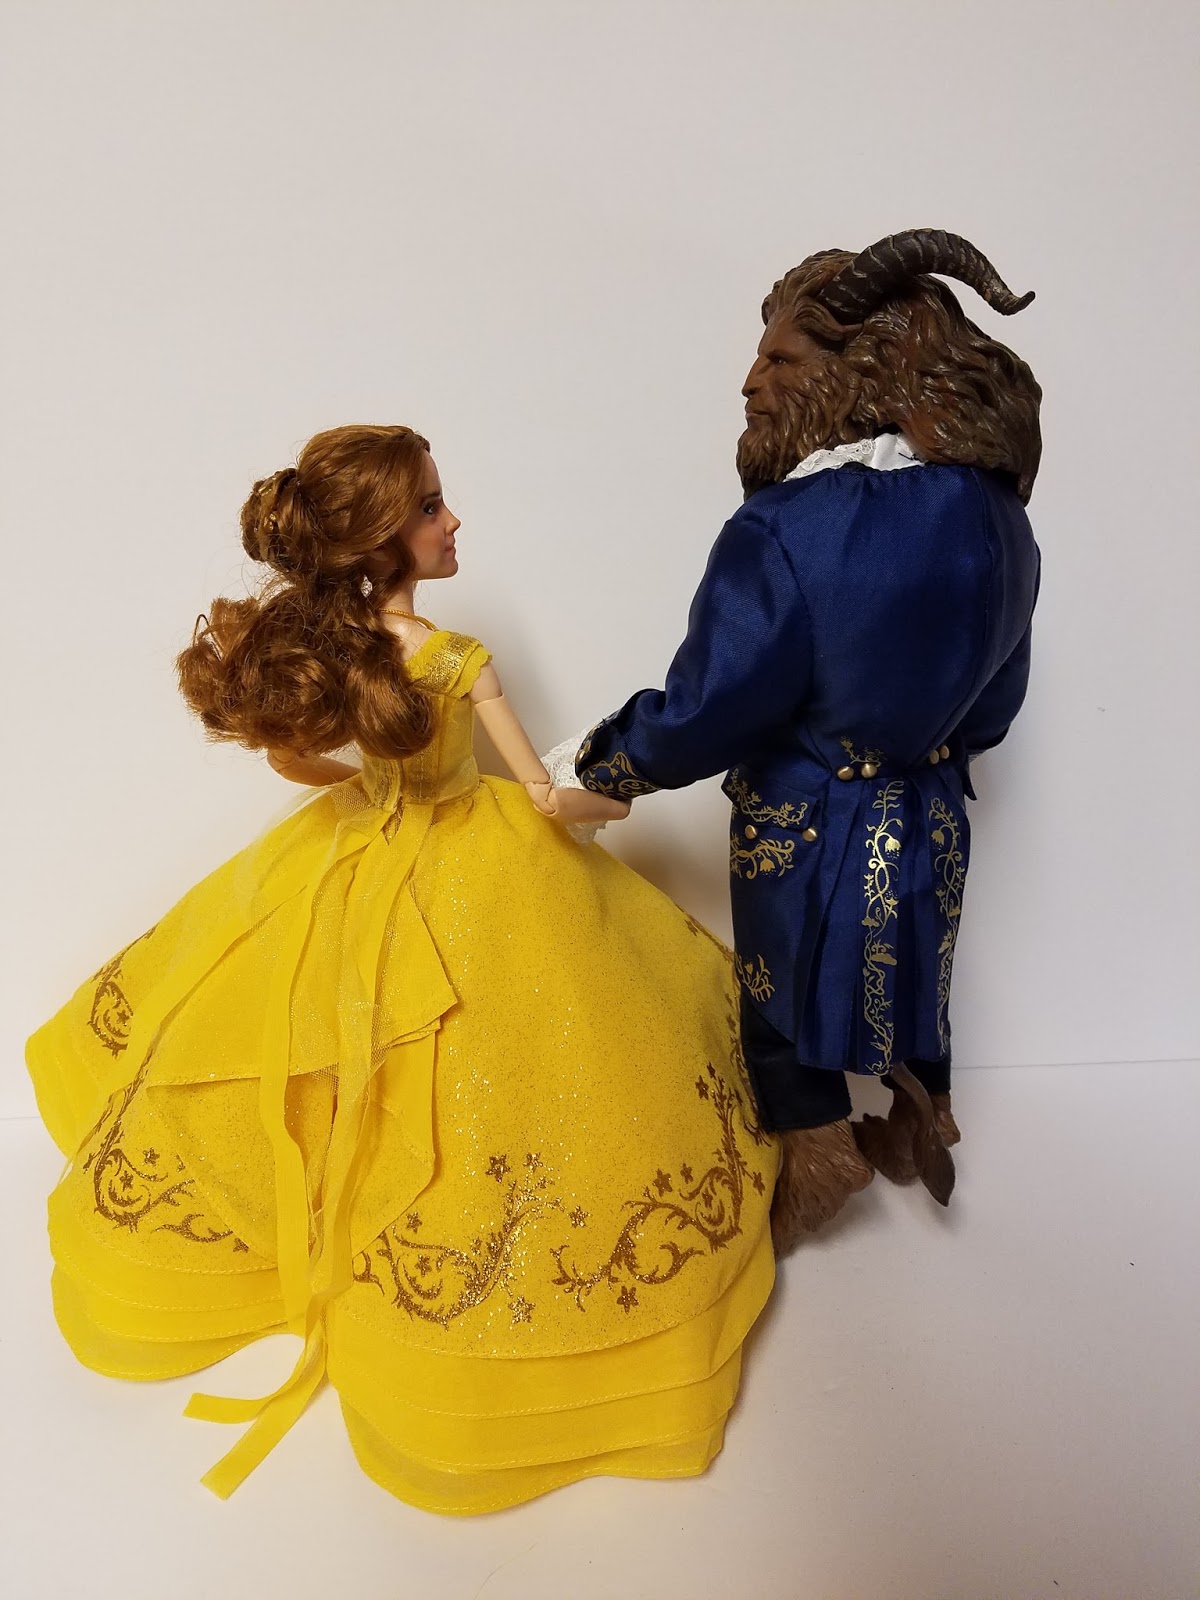
Belle's photo shoot:


And yes, I finally did decide to open my Disney Store Beast. I didn't want Belle to be lonely. This guy has amazing detail and is a big improvement on the Classic Beast doll. :) I'd love to get a review up sometime soon, but I don't want to promise anything yet in the crazy upcoming weeks.


Ever After High Ashlynn Ella Faceup
Okay, on from my least favorite to one of my very favorites. ;) Ashlynn was a thrift store rescue who needed a new face.

Her first layer of watercolor pencil.

My main goal with this doll was to try my best to follow through with colored pencil all the way to the end. On my past dolls, I'd gotten impatient and filled in with paint at the last minute. While that works too, I have a hard time getting a nice, smooth layer of paint on the eyes, and I love the control I have with the colored pencils. With Ashlynn, I really wanted to try to keep to colored pencils aside from the eye highlights.

P.S. This whole coloring, then another layer of Mr. Super Clear, then coloring again, then another MSC layer thing is not for the faint of heart. It's a long, time-consuming process, but well worth it when you're done. :)

But at long last, I had a doll with nothing but soft pastel and colored pencil coloring...aside from the eye highlights, just like I'd hoped.

I added some gray shading to her eye whites, and then made the mistake of adding Liquitex varnish to her eyes (to make them shiny) before putting on another layer of Mr. Super Clear.
I ended up completely ruining one eye and having to recolor it. :(

Once I'd fixed the problem and sealed her again, I tried the varnish a second time and let it dry. It still smeared the gray eye shading a bit on her right eye, but at that point I didn't want to try to redo things again.

I found her this super cute Barbie artist outfit at Tuesday Morning for $3.00. I've decided her name will be Ashley, and she'll be an artist by trade. :)

Even with the slight smearing on her right eye, I'm still super happy with her.

I also discovered throughout this whole process this week that Ever After High dolls are my favorite ones to paint. Their eye lines are more subtle than a Monster High doll's, allowing for more interpretation, and their faces are fairly flat, making a surface similar to a flat sheet of paper, my usual canvas. ;)
OOAK Monster High Lagoona Blue Mermaid
This was one of my most ambitious projects of the week. Ever since I found this sweet Lagoona at Goodwill (minus one hand, which is why she has a Frankie Stein hand on her left wrist), I knew I wanted to make her into a mermaid.

But first, I had to start with her face.

Layering color...

...and more color...

...and more color...

...and more color.

With Lagoona, I reverted to my old ways and added paint to the whites of her eyes, partially because I was having a hard time getting the white watercolor pencil to be bright enough. I also used white paint for her eye highlights.

For a finishing touch, I added glitter to her cheeks and nose and some stick-on jewels to her forehead.


Now it was time to make her mermaid tail.

I removed her legs and began forming a wire armature for the tail, with the hope of making it both strong and posable.

For those of you interested in doing this, I would recommend using one of the older Monster High dolls that have legs connected by elastic. These dolls have a hole in the lower body where the elastic goes through, making it a lot easier to use the wire armature idea (you can just slip the wire through from one side to the other). Middle Gal's Draculaura didn't have this hole, so we had to actually cut one in the hip sockets for her mermaid tail armature.

I used several layers of wire for extra strength.

Some of the YouTube tutorials I'd watched used cloth to stuff the mermaid tail and then put cloth over it. I didn't have much on hand, but I did have some lace, so I started with that.

After the lace, I covered the tail with some simple white cloth from an old, stained hanky.

Then I covered it with this purple material...but I wasn't happy with the result. It was obvious that the tail was just a bunch of stuffed material with some purple see-through material on top. Plus, with all of the layers, it made her bottom half look huge compared to her top half.
I didn't get any pictures, but I decided to remove the top two layers. I painted the lace with mod podge and then three different colors of metallic paint. The lace actually ended up looking a bit like mermaid scales, which was a happy accident. ;)

Now it was time to make the fins. Taking inspiration from THIS YouTube tutorial, I traced a fin pattern on a sandwich bag. I cut two matching fins and glued flexible wire between them around the outside edges. Then I covered the whole thing in mod podge.

One side almost dry!

Once the mod podge was dry, I painted the fin and covered it in glitter. Then I hung it from my dining room light to dry.

Once the fin was dry, I attached it to the bottom of Lagoona's tail with hot glue. Then I added all sorts of sequins, glitter, and other embellishments and let it dry overnight.

And here she is, all finished!

I wanted Lagoona to have more than just seashells up top, so when I made her Sculpey seashells, I also made a starfish and two mussel shells to add to her bodice. I later added pearl-like beads and fake gemstones, too.

I added lots of embellishments to the top of her tail as well.
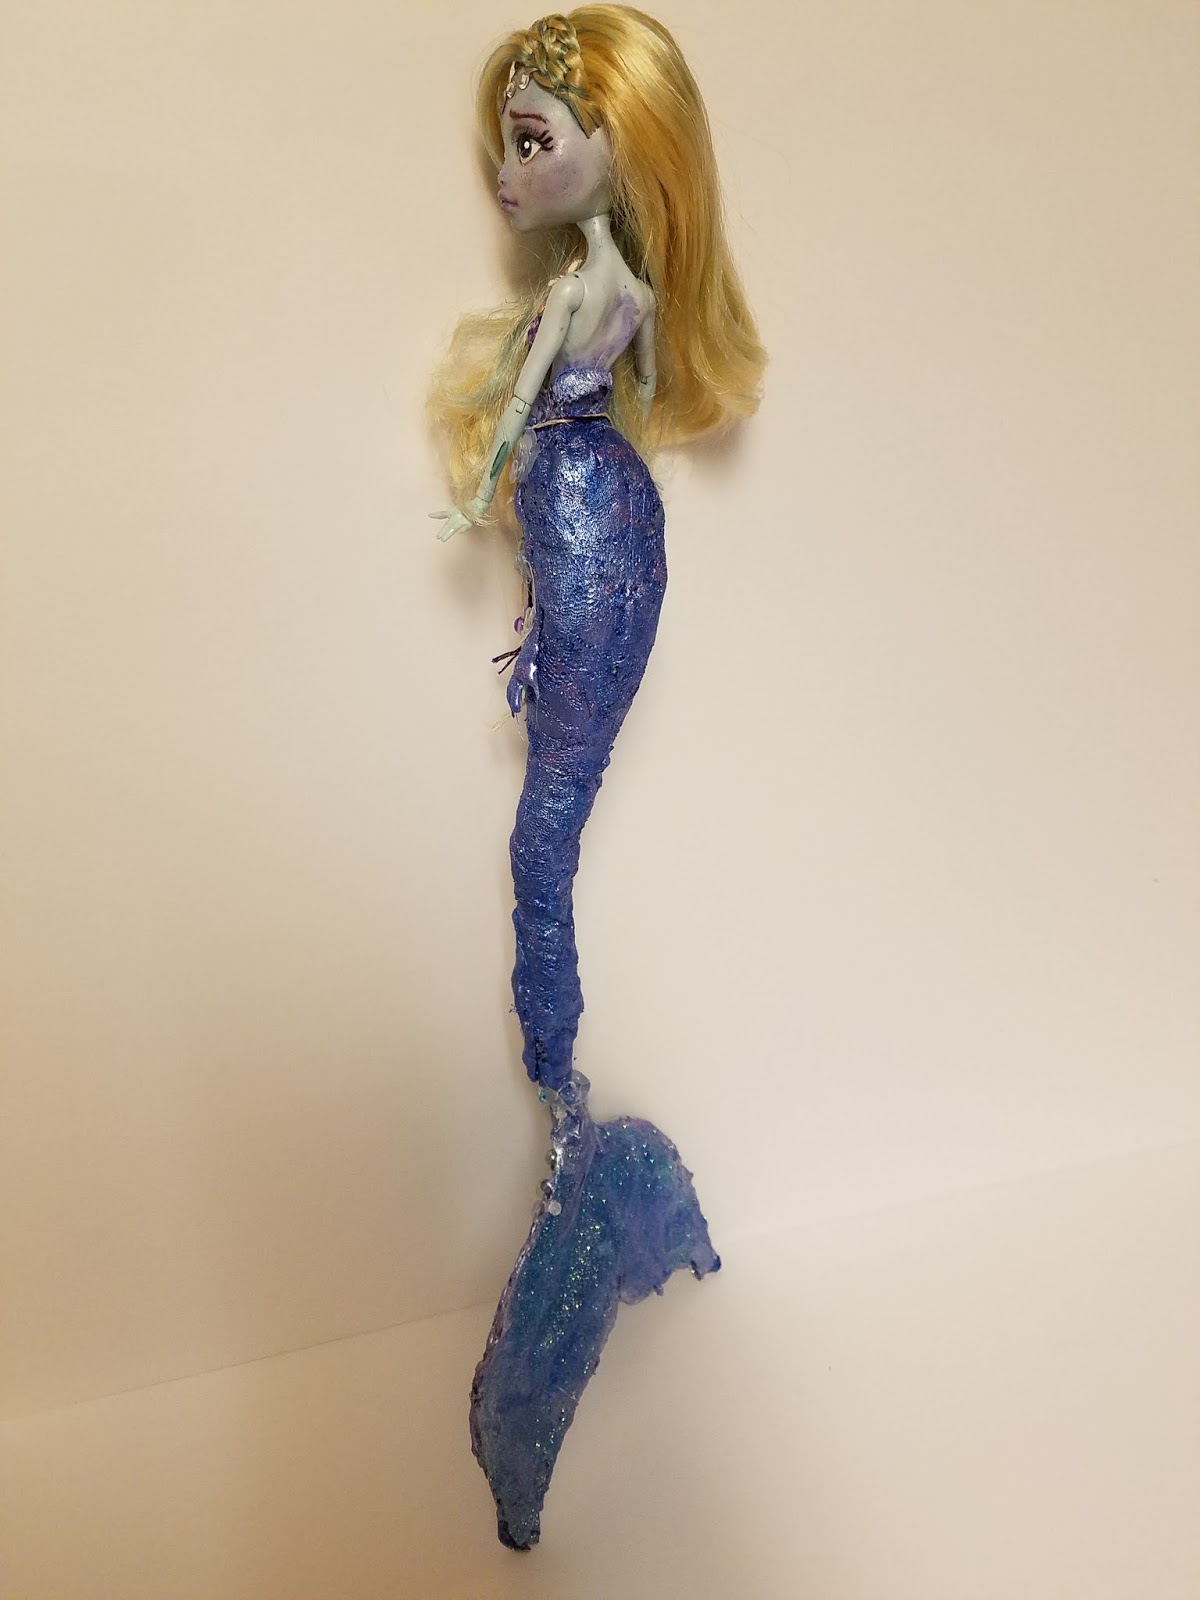
Here's a view from the back.

This picture shows how the lace works fairly well as mermaid scales. ;)

I'm especially proud of the way her fin turned out.
Because of the way it's constructed, it can be posed:


Her tail is also posable, though, sadly, not to the extent I'd hoped. I think part of this is because of the mod podge. I was trying to seal the lace before I painted it, but I think next time I might try just painting the lace instead. I also crammed so many things at her abdomen, the top part of her tail can hardly bend.

And when I do bend it, the unpainted sections of lace are exposed.

I also ended up with a pretty sloppy section of glue where her tail and her fin connect.

Unfortunately, I didn't keep enough of the base of the tail open to poke in the wire I'd left at the top of the fin, so I ended up just having to smother the whole thing in glue to keep it together. :{
Overall, though, I'm still happy with her. I have a few ideas of how to do things better the next time around (such as, aside from the tail issues, keeping her eye colors lighter so I don't box myself in with such dark colors so early), but for my first attempt at such an ambitious custom, I suppose it's not too shabby. ;)


OOAK Monster High 17" Draculaura
A month or so ago, I found a 17" Monster High Draculaura at Tuesday Morning for a great price, and my mind instantly came up with a ton of great ideas for a custom doll. I'm not sure what happened to the pictures I took of her when I first removed her from the box, but here she is with all of her face paint and clothing removed:

I knew that I wanted to rewig this doll, so I decided to remove her head. I've gotten pretty good at popping Barbie and fashion doll heads off in recent months, between all of the repainting and rebodying we've been doing. I foolishly assumed this head would be just as easy to remove.

I was wrong. :(
While the bigger dolls are constructed the same basic way, their heads are a much harder plastic. When I applied too much pressure to the head, the thin, plastic bar holding in the plastic joint that keeps the head attached popped loose, and the head AND joint came off in my hand. Sigh. I'd have to figure that out later.

Getting hairplugs out of this harder head wasn't easy either.

I cut the hair as close as I could to her scalp and decided to call it good enough.

I had a few harebrained attempts at trying to reattach the head and body...

...but none of them worked.

I did at least manage to get the head joint out of the head, though. (P.S. Sorry I'm calling it a head joint. I'm not sure what else to call it!)

Ta-dah!

I decided to save the reattachment project for later and started her faceup.

It was a decent attempt...

...but as I added layer upon layer, and finally resorted to paint...

...I just wasn't in love with her look.

Her paint ended up clumpy, her eyes were super dark, and she wasn't what I'd envisioned at all. About this time, my Ashlynn Ella doll was turning out beautifully.

So, in a bold move, I removed Draculaura's face paint and started all over again. I knew it would be easy enough to redo smaller dolls, but I wasn't planning on doing a lot of 17" dolls, so I really wanted this one to be special.
I drew a lot of inspiration from Nicolle's Dreams for this one, and I started with softer browns instead of harsher blacks on her eyelashes and eyes.


I think there was probably some residue of the acetone left over, because I had a really hard time getting the colors to stick on certain parts of her eyes, especially in the whites.

I finally decided to paint the whites of her eyes as well as the highlights. Everything else was done with watercolor pencils and soft pastels, though. Like I did with my Lagoona, I added some gemstones to this doll's forehead. I envisioned her as an Elven princess.
I didn't capture it on film, but I was finally able to reattach her head with some advice from my dad. I basically attached the neck joint to the plastic stick that was supposed to hold it in place, and then coated the stick heavily on both sides with super glue. So far, she's holding together well, but still has her head articulation.

I knew I wanted to give her dark hair of some sort. My mom had this doll hair she'd found at a yard sale, so I thought I'd give it a try. Unfortunately, it ended up being pretty crazy, like she'd just taken her hair out of dreadlocks and needed to wash it or something. ;) I couldn't brush through it without damaging it, and my attempts at trimming it didn't help.

So, as a solution, I put it in a fancy braid and added jeweled embellishments.

I think it gives her a part medieval, part Gibson Girl look. ;)

I'm still deciding on a name for this one. Any suggestions? I'm thinking something Elvish or medieval. Speaking of which, she has a medieval-style dress on the way, but in the meantime this white bandana is a stand-in outfit. ;)
I hope to eventually rewig her with a smoother wig, and as I look at her there are several small things here or there I wish I could change. As with my other customs, though, overall I'm pleased with the result. I've learned so much about customizing from our week of crafting fun. :)


Interested in trying some doll customizing yourself? Here are some great places to get some ideas and inspiration.
Here are the three videos I used as inspiration for my custom mermaid doll:
And if you do decide to use Mr. Super Clear (which I highly recommend if you're going to go to the trouble of customization), please, please, please read THIS forum about the dangers of not using a proper ventilation mask. I was so thankful I read this before I started working with it. Messing with your lungs is no joke. (And for those of you who are worried, I do NOT allow my girls to use Mr. Super Clear, and never use it indoors or around them.)
I hope you guys enjoyed this look at our crazy Spring Break week, and that it inspires you to try some crafting of your own! :) Have any of you tried customizing dolls? I'd love to hear about your projects. :)