Showing posts with label rewigging. Show all posts

Monday, April 9, 2012

BFC Ink Kaitlin Thrift Store Find

Right before Middle Gal's party, my mom found another BFC Ink Kaitlin doll at Salvation Army.  This one was one of the fully jointed versions (yay!).  


Her hair was pretty messy!

She had her original dress and vest...

...and her legwarmers too, but no boots.

I was amazed to see the difference in the faces of my two Kaitlins.  The fully jointed Kaitlin (on the left) has eyebrows much closer to her eyes, which gives her an older, more teenaged look.  I think my older Kaitlin (on the right) looks more sweet and innocent.

Since the new Kaitlin's hair was such a mess and I knew I'd have to wash it, I decided to take out her braids.

I opted for shampoo and conditioner rather than downy since her hair seemed dirty and I knew it wasn't the greatest quality anyway.

Drying hair dolly style! :)

Here she is with her hair all dry.

I was a bit disappointed with the final results.  Her hair looked great on top but was still incredibly fluffy and dry on the bottom.

She was still a lovely doll, though.


After a few weeks, I decided to try rewigging her.  My original plan was to use this doll to replace my old Kaitlin, because I prefer the fully jointed body style.  However, I liked my older Kaitlin's face better, and I didn't need two identical dolls.  

So off came her hair!  I used scissors to get the hair cut as close to her head as I could.  After these pics were taken, my mom actually used her hair clippers on Kaitlin 2 and was able to get the hair even closer to the scalp.

And so began the great wig fitting, as I tried to figure out the best look for my newest BFC Ink doll:
This one was a Blythe wig from eBay seller shopoholican.

This was a "Carmen" wig from I believe Global dolls.

A crimped "Alice" wig from...um...I don't remember which wig company.

A size 10 "Rose" wig purchased from Prillycharmin.com.

Hailey's old auburn wig...a "Denise" from Monique dolls.

Emily's old blonde wig...the same style and company as the previous wig.

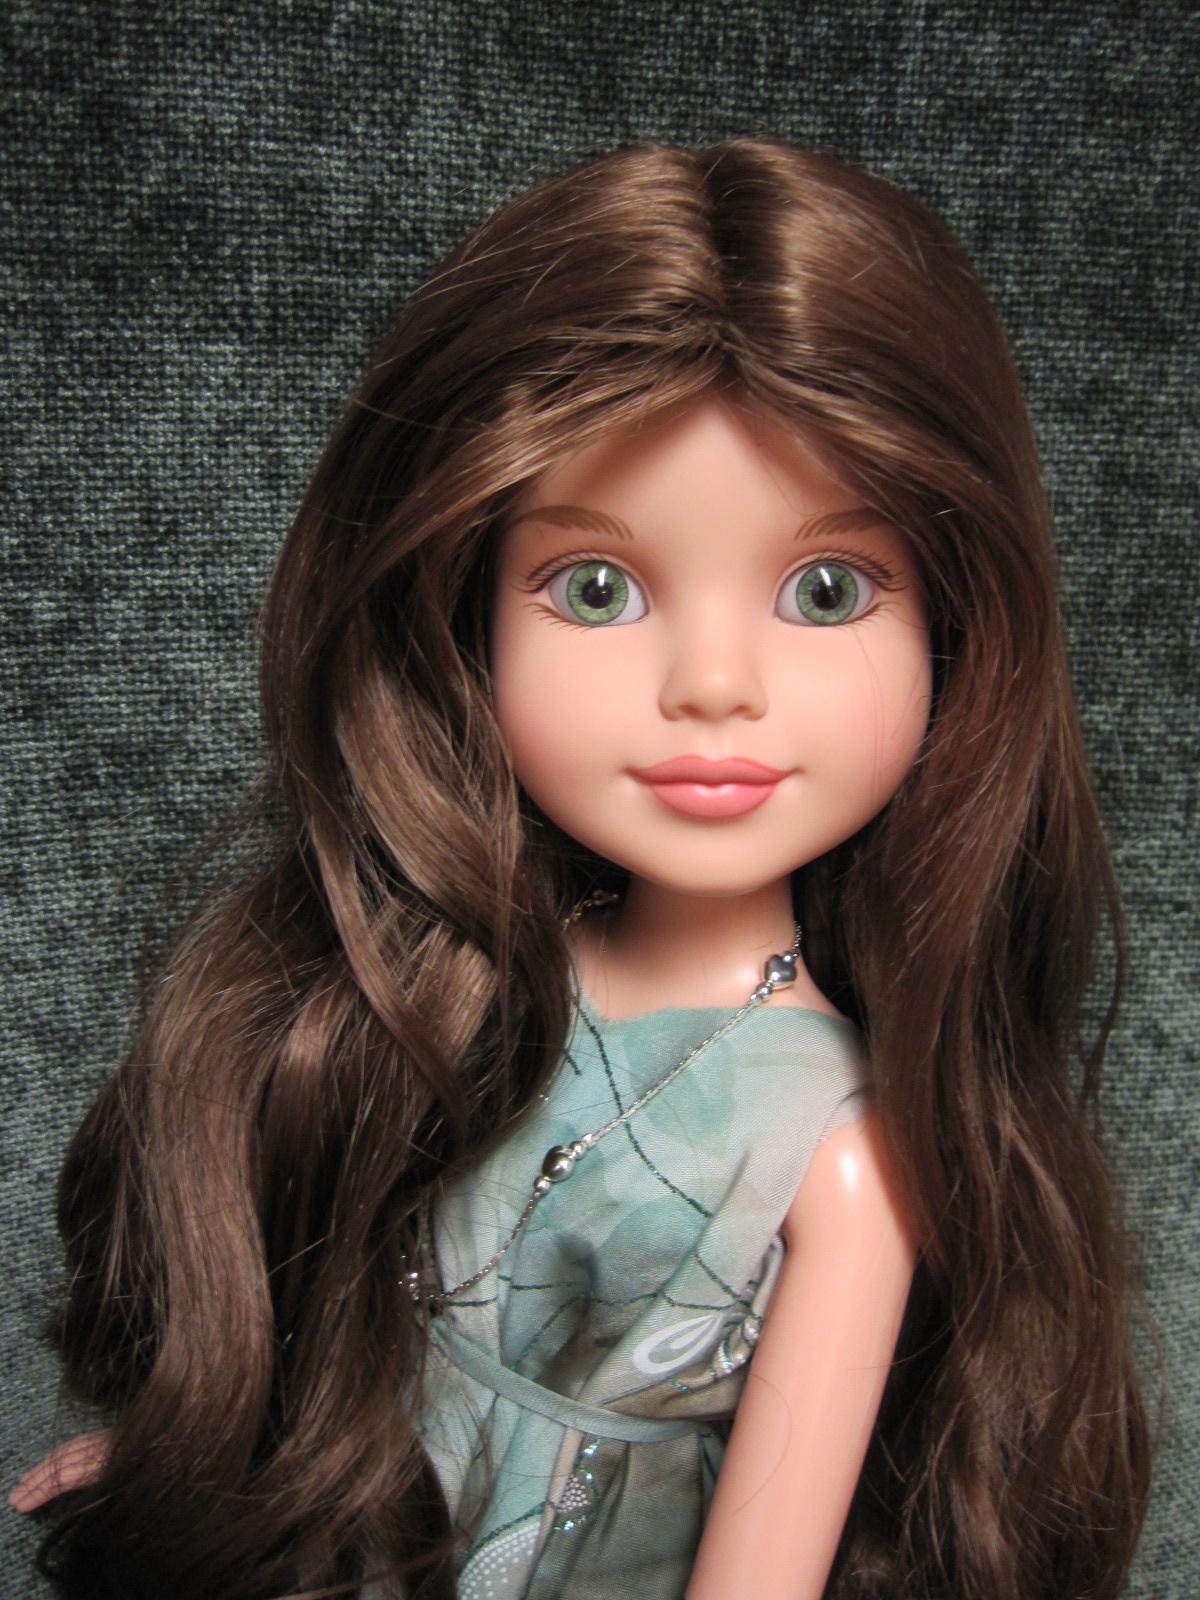
In the end, I decided to remove the pin curls from the "Carmen" wig and have it down all the way.  I really liked this look on Kaitlin 2 (who is still awaiting a new name...and awaiting her fate.  I may end up reselling her, but I haven't decided yet).

After fiddling around for a bit, I decided to try a side part with the same wig.  I thought it gave it a little more elegance.


Lol...of course, after all this, about 2 weeks later I switched back to the crimped "Alice" wig.  At Hubby's recommendation, I used a claw to clip back part of her hair, and it made a world of difference!


  I just can't seem to make up my mind! :}  Which look do you like best?

Wednesday, July 28, 2010

Picture of Hailey's haircut


Hey, just thought I'd show you the picture of Hailey's haircut that got deleted from the last post, so you could get an idea of how much hair I kept on there. Of course, if you're re-wigging an American Girl doll or another doll that comes with a wig, you don't even have to worry about this because all the hair comes off in one big piece...at least, it's supposed to! :)


The Gotz Precious Day dolls have rooted hair, so that's why I had to cut it off. As another point of interest, one way to tell the difference between a Gotz Precious Day doll and a Gotz Little Sisters doll is that the Little Sisters line had wigged dolls, while the Precious Day dolls had rooted hair.


That's all for now...keep checking back for more interesting stuff!

Tuesday, July 27, 2010

Some Past Doll Projects- Part 2

Okay, on to Part 2! This poor girl is a Gotz Precious Day Elisabeth doll from 2003 or before (in 2004, they started using a new face mold). I bought her on Craigslist for $38. I know you're probably wondering why I would spend that much on a doll in this sort of shape. In my defense, I knew her bangs had been cut, but I had no clue her hair was cut in the back, too. As it turned out, it worked out okay because I was figuring I'd have to rewig her anyway.


So here you can see some more "before" pics. Her hair was horribly cut, her neck strings were loose and some stuffing was coming out at her neck. She also had various smudges on her vinyl, the worst being a big black mark on her left hand (see the picture below). It really looked like permanent marker, so I wasn't sure how much luck I'd have getting it off, but I figured it was worth a try!


I got started with my trusty Mr. Clean Magic Eraser, like I had with Katie. Let me just take a moment to say, if you haven't tried this before, there's nothing more amazing than a magic eraser to take old dirt, grime, and rub marks off of vinyl. You'd be amazed what comes off of these dolls with a little elbow grease. I've even been able to use it on some of my daughter's other plastic toys. We have hardwood floors, so their dolls and toys are constantly getting rub marks! Anyway, once you use these guys, you'lll start stocking up on them. I think I have 2 boxes of Magic Erasers right now! :) And just to let you know, the off brands work okay, too.


After I'd finished with the magic eraser, I untied her neck strings and removed her head. Kinda
creepy looking, but now I could get that stray stuffing back in and tighten her neck strings. That alone did wonders. Retying the neck strings wasn't as hard as I thought it would be. You just have to make sure you get the strings tied as tightly as you possibly can!

Before I put her head back on, though, I worked on her hair.  I used scissors to cut as much of her hair off as possible. When I was done, she looked like she had a short buzz cut. I had a picture uploaded to show you, but this annoying blog program just deleted it and I'm still trying to figure out how to add a picture in a specific spot. So you'll just have to take my word for it.

Some people who re-wig dolls go inside the head and remove all the hairplugs. I've never done this, first, because I'm too lazy, and second, because I've found it still works (depending on the new wig) to use the doll with her short hair still on her head.

So here are some pics of Hailey (the new name I gave her).
As you can see from the picture to the left, the magic eraser took that ugly black spot completely off. She had quite a few
pink and brown marks on her hands and feet that came off
too. I didn't think her skin would clean up as well as it did.
Like I said before, Mr. Clean Magic Erasers will amaze you!


                                                                                                     Here's Hailey in her new wig. I used a "Denise" wig in auburn from the Monique company. I purchased it on ebay for a good price. The bangs are a little difficult to get right. Hailey's gone through several bang changes since I got her! Overall, though, I love the quality and color choices of these wigs. The Gotz dolls seem to have slightly bigger heads than some of the other 18" dolls, too, so these wigs work well because they run a little big. I used a size 12-13, which works great, but I've tried other brands of wigs in the same size that I couldn't get around her head.


Here are a few more pics of Hailey. In this one she's with her best friend, Danielle. Danielle is a Gotz Hildegard Gunzel doll I got at Tuesday Morning for $15!! Her original price was $169.99! She has the same face mold and all vinyl jointed body as the Gotz Sarah dolls. Just recently, they've been renamed the Gotz Hannah dolls, and are still being sold in Europe.
In my last post, I mentioned the different Gotz Little Sisters outfits. Hailey is wearing Tess's floral print meet outfit, so you can see the difference.


Here's a picture of Hailey with her two sisters, Tess and Ella. I thought it would be fun to make them sisters since they all have the same eye color and face mold. Also, I have 3 little girls of my own, so it's kind of a tribute to them. In case you're curious, Ella is another Gotz Precious Day Elisabeth doll that I renamed. I also put her in my extra Gotz Little Sisters Katie jumper so she would match better with her sisters! You can also see my pre-Mattel American Girl Felicity doll and my Alexander Girlz Maggie doll, made by the Madame Alexander company.


Here's a picture I took right after I got Hailey all fixed up. This was before I got Ella, which is why it's just the two of them in this picture.

So, I hope you enjoyed part 2!! That's all the past doll projects I have pictures of at this point. My next project will be a pre-Mattel American Girl Samantha doll I bought on Craigslist that needs some definite TLC. I'll keep you posted on how that project's going, too.